Today’s guest post is by Ben Romenesko of Miller Electric.
What comes to mind when you see something made of aluminum that needs to be repaired? Is your reaction one of hesitation — “Oh this is going to be a tough one to get fixed?” Aluminum has a reputation of being difficult to weld, but the reality is that it’s just different than MIG welding steel.
Miller Electric Mfg. Co. offers an aluminum solution with each machine in the Millermatic® lineup to give the do-it-yourself welder the ability to easily and economically build or repair aluminum projects. By understanding the differences in technique and equipment needed, aluminum projects can become much easier for you.
MIG Welding Aluminum with Different Properties
One benefit of aluminum is you don’t have to worry about rust, right? Well aluminum won’t rust, but bare aluminum forms a layer of aluminum oxide very quickly. The oxide layer, along with the high thermal conductivity rate means that aluminum requires higher amounts of power (than steel) to form a molten puddle and weld.
The high thermal conductivity of aluminum makes the heat affected zone much larger than steel welds, but also means the puddle can be difficult to control. Unlike the one very common steel wire alloy, ER70S-6, aluminum welding has two common alloys to choose from. 4043 aluminum wire makes the weld puddle easier to control because it contains silicon, but in turn, strength and corrosion resistance is much lower than 5356 wire.
For most projects or repairs, 4043 alloy will be adequate. It’s the structural or corrosive applications found in industrial settings that need 5356 alloy aluminum. Another big difference is that aluminum has about one-third the column strength of steel. Column strength is the force that the wire can withstand before it buckles and causes feeding problems. Aluminum’s lower column strength means that a different method is necessary for feeding aluminum weld wire effectively.
Different Equipment for MIG Welding Aluminum
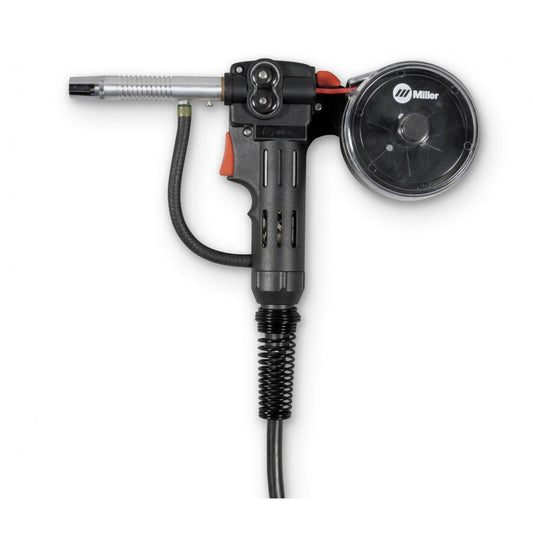
Aluminum welding requires configuring your MIG welder differently than for steel welding. The big difference is the method of feeding the wire to the weld. The solution to combat this difference in column strength is a spoolgun. A spoolgun contains the welding wire and feed mechanism inside the torch. This allows the wire to be pulled directly off the spool through the motor and straight out the end of the torch.
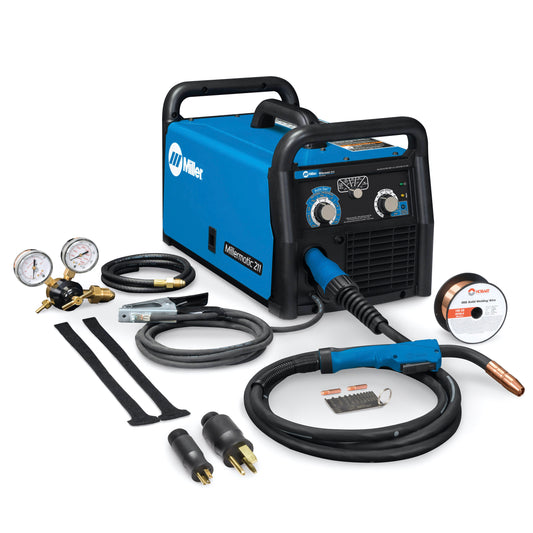
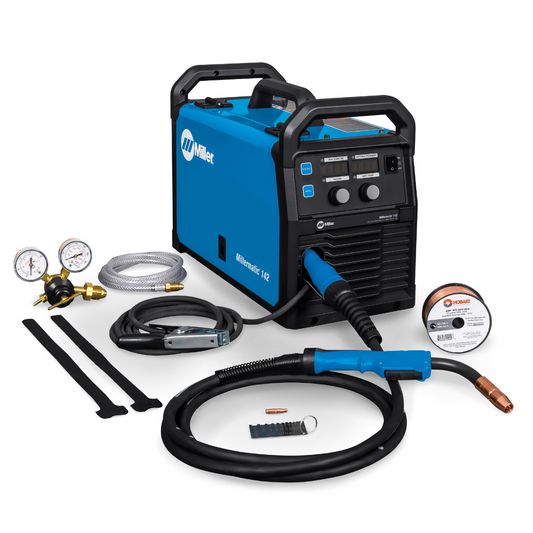
Miller offers a variety of spoolgun options. For the Millermatic 142, 180 and 211, a direct connect Spoolmate 100 makes hooking up your spoolgun just as easy as hooking up a standard MIG gun. Some industrial systems use more advanced wire delivery systems like push-pull guns, but those applications are targeted at production applications. Aluminum is welded DC electrode positive (DCEP), just like steel or stainless steel. However, MI welding aluminum does require 100 percent argon shielding gas instead of CO2 or a CO2 mixed gas.
Not to get too technical, but MIG welding has a couple of different methods for transferring the wire to the weld puddle. Typically non-production steel MIG welding is done with a short-circuit transfer. This works great on steel, but it doesn’t input enough heat into the base material to break the oxide layer when welding aluminum.
For that reason, aluminum is best welded using a higher energy spray transfer, a transfer method where the wire is never actually shorted to the material. The spray transfer has adequate heat to break the oxide layer and penetrate the base material.
One important thing to note is that a correct spray transfer won’t spatter, but will sound more like hissing. Equipment selection is critical on this one. Miller recommends that you always use a machine capable of 230V input power so you have enough power to achieve a spray transfer. 120V machines like the Millermatic 140 will weld aluminum for small repairs, but it is not recommended for fabrication because it’s not capable of achieving a spray transfer. The Millermatic 180 is a great starter machine when looking for a product for entry level aluminum MIG welding.
Different Technique for MIG Welding Aluminum
Aluminum requires a slightly different technique than steel. Before you start welding aluminum, clean the welding surface like you would steel, but be sure to use a stainless steel brush dedicated only to cleaning aluminum so you don’t contaminate the weld area.
Your travel speed will need to increase compared to welding steel. Due to the high rate of thermal conductivity, aluminum welding requires you to move quickly to prevent burn through. If your travel speed is too slow, the puddle grows quickly and the puddle will burn right through the base material.
When welding steel, you can use either a push or drag technique. Aluminum requires that you always use a push technique. A 10-15o push angle is optimal for adequate gas coverage as shown in the figure to the right. Consistent contact-tip-to-work distance is important for MIG welding, but with aluminum you will want to increase that distance to 1/2ʺ to 3/4ʺ to prevent the weld heat from expanding the weld wire in the contact tip (This causes burn back).
Part fit-up is also critical when welding aluminum. The weld puddle is more fluid so gaps won’t fill nearly as easily as steel.
Below you will find a list of common problems that can occur when MIG welding aluminum and solutions to fix them.
Aluminum Troubleshooting
Sooty Welds
- Improper material cleaning
- Improper torch angle (must push)
- Lack of shielding gas (20-30 CFH 100% AR)
Burn Through
- Increase travel speed
- Decrease welding parameters
Ropy (High) Bead
- Not achieving spray transfer: Be sure to use 230V input and Increase
voltage
Weak Weldments (incomplete fusion)
- Improper material cleaning
- Too much heat input
- Increase travel speed: Decrease parameters
Burn Back (pinned contact tip)
- Increase wire feed speed
- Decrease voltage (but remain in a spray transfer)
- Check contact tip for correct size
- Check spool hub tension in spoolgun
- Check drive roll tension
Bird-Nesting MIG Wire
- Be sure to use a spoolgun
- Check contact tip for correct size and/or obstruction
- Ensure wire is in drive roll groove